


UPDATED MAY 1, 2025.
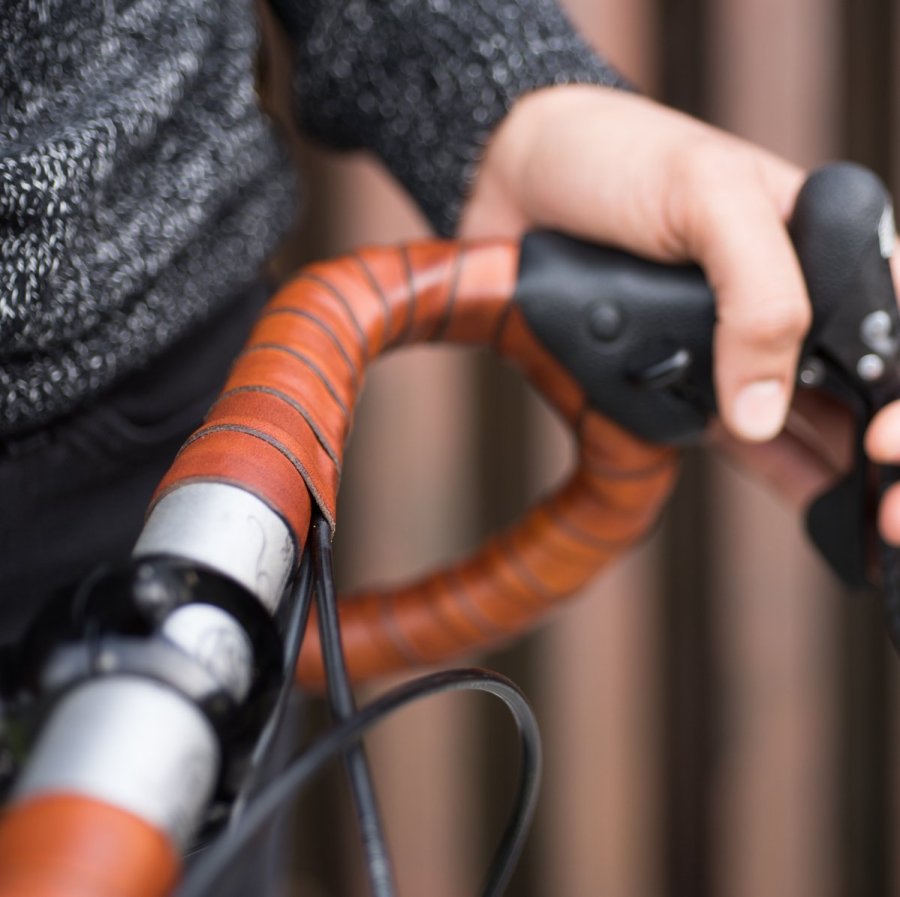
Sometimes customers need to adapt their vegetable-tanned leather goods by cutting a new edge. (This is most common with our leather wrap kits: such as making space for the gear shifter on a mountain bike with Leather City Grips, or adapting the Sew-on Leather Bar Wraps to a bullhorn bar.)
In this post, we'll tell you how you can create a new, clean edge on your veg-tan leather using common household tools,

Table of Contents
DIY Leather Cutting
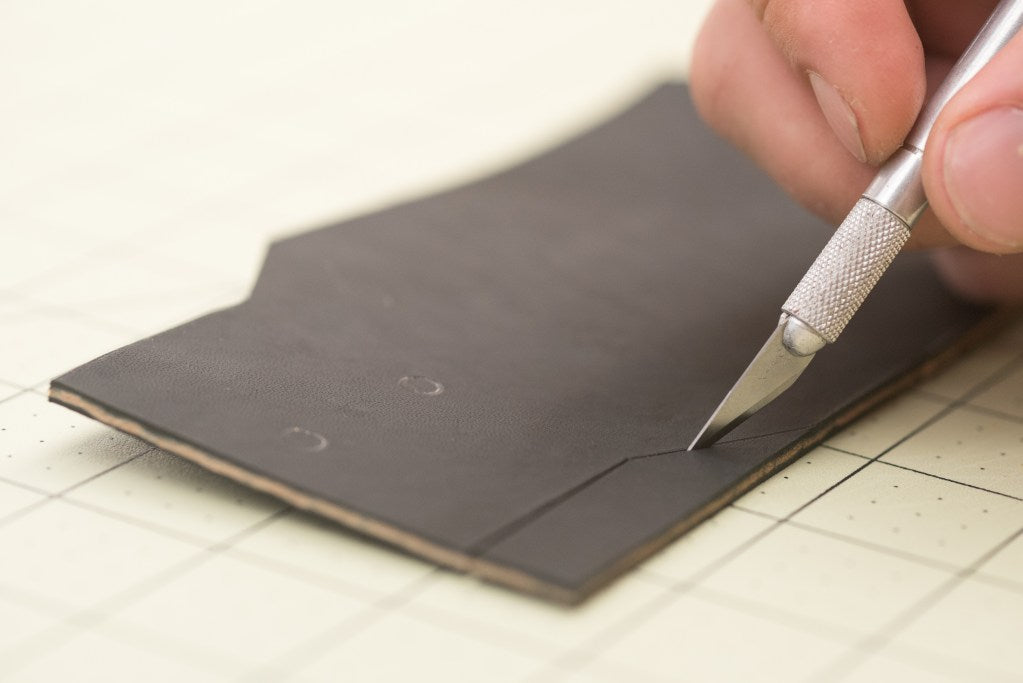
Cutting leather is done easily enough with a pair of sharp scissors or an exacto blade.
An exacto blade is better for thicker leather. Use a metal straight edge on a grid mat for a perfectly straight cut. Be aware of your body and the blade at all times. Keep your fingers on the straight edge surface to avoid cuts!
TIP: If it's a wrap with pre-punched stitch holes, you may need to cut twice: once from each end. This is to prevent cutting through the middle of a stitch hole.
As my father used to say, measure twice and cut once!


What is Leather Edge Finishing ("Edging")
Old-timers say you can tell the quality of a leather piece by how its edges are treated. A straight, rough cut shows the economy of a product, while waxed, rounded, smooth edges are a hallmark of quality.
We send all our leather products out with fully-finished visible edges, which requires three treatments or techniques:
- beveling
- edge-dyeing
- burnishing
However: if the edge isn't going to be visible, because it is hidden under whip-tying for example, a finished edge isn't necessary on full grain leather for wear-and-tear reasons.
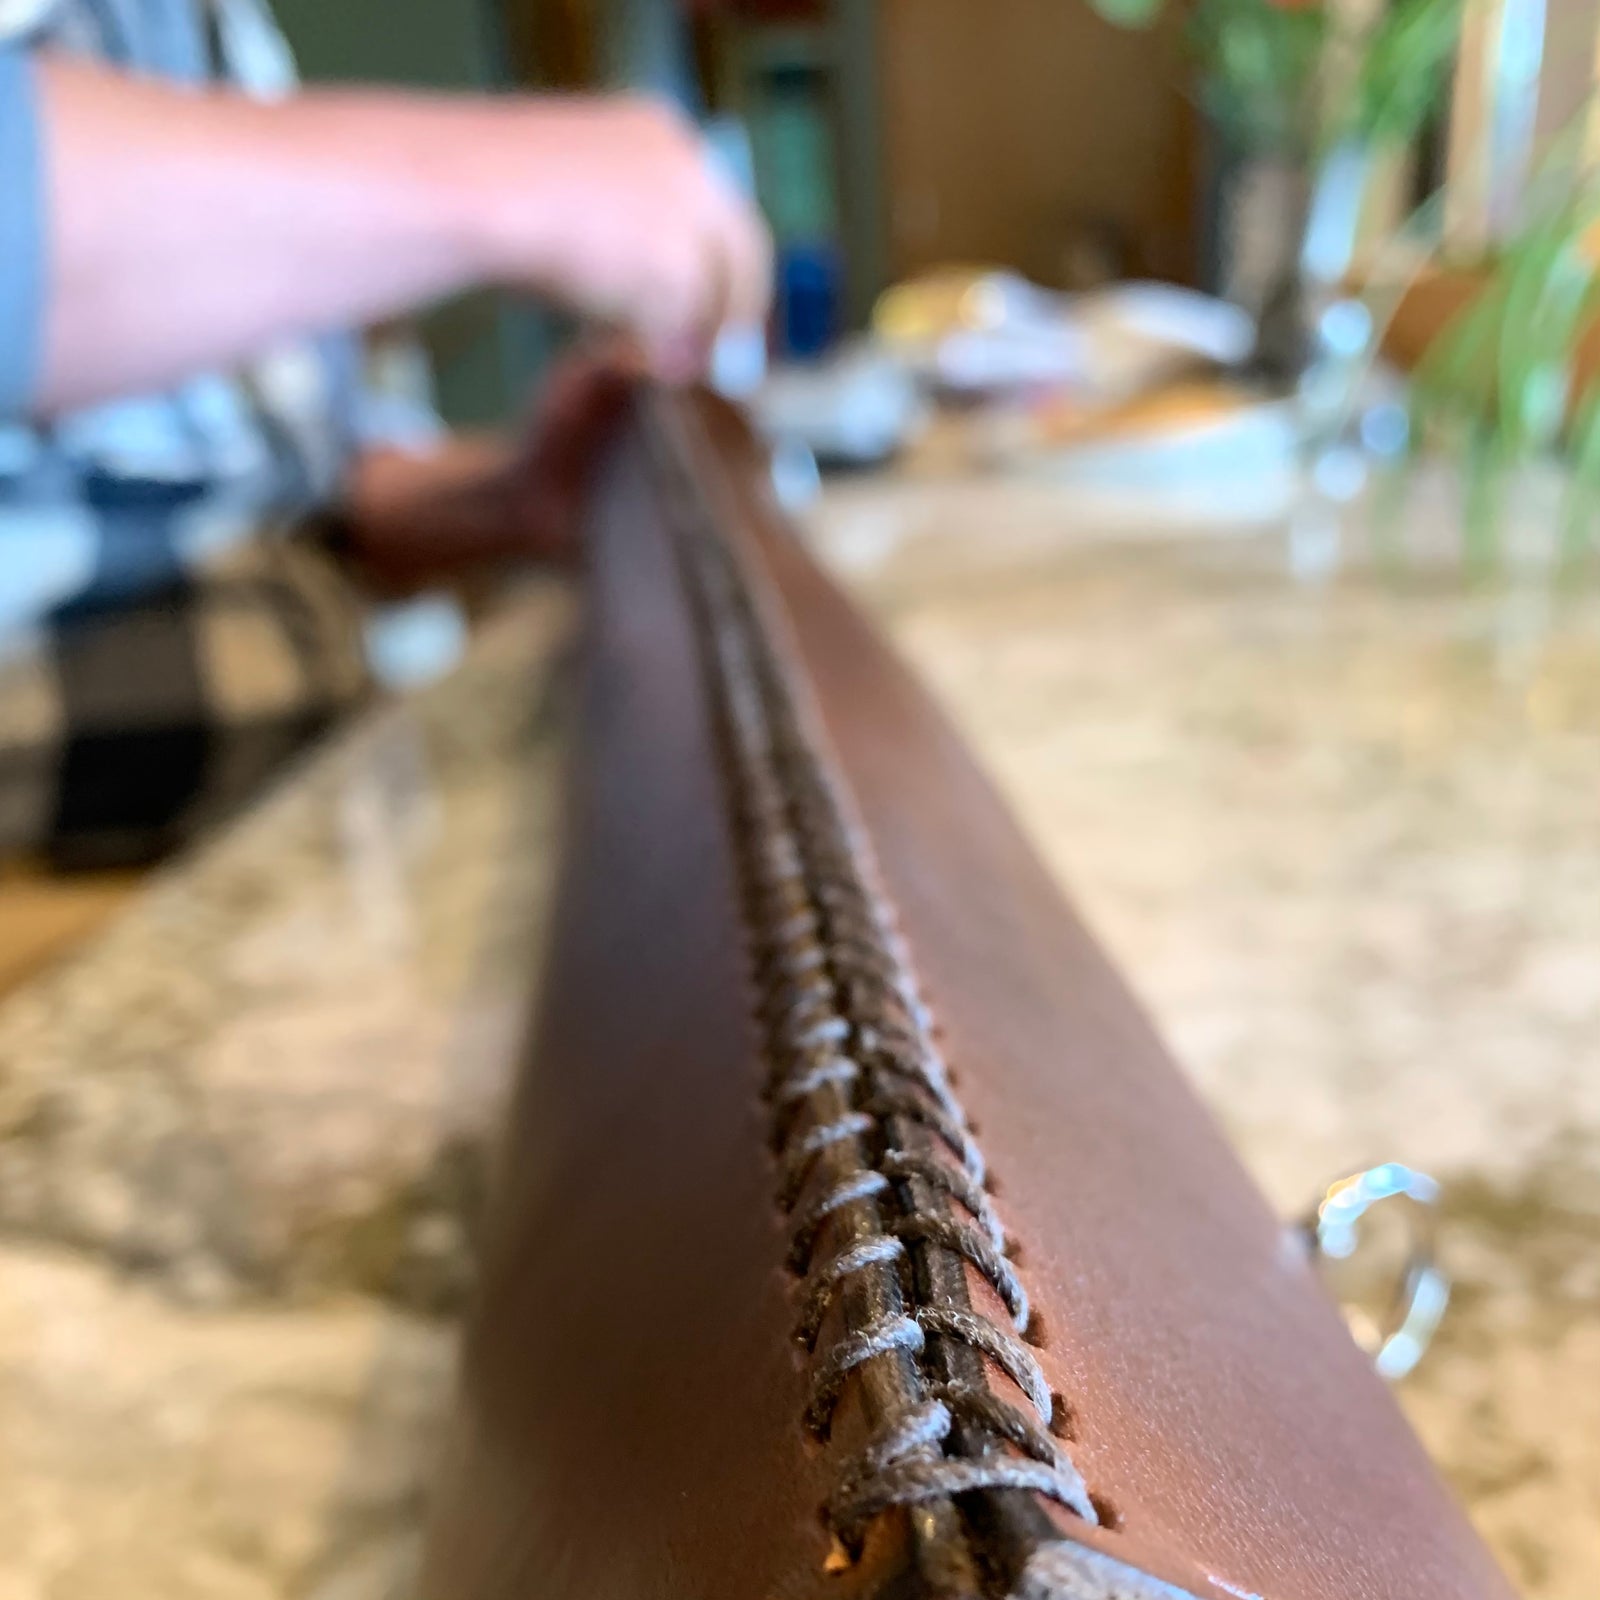
Sometimes out in the world you see extra edging steps like stitched edges, particularly on low-quality leather that uses glued leather dust on a fabric base. Our high quality, vegetable-tanned, full grain leather doesn't require any edge treatments at all: it's structurally sound and won't fray or disintegrate.
To replicate our fully-finished edges at home, we share each technique using simple tools here. Finished edges are the details of the design, quite literally rounding out the rough edges.
Although there are three steps in leather finishing, you don't have to do all three! It's up to you and your project. They are, however, always done in this order:
- bevel
- dye
- burnish
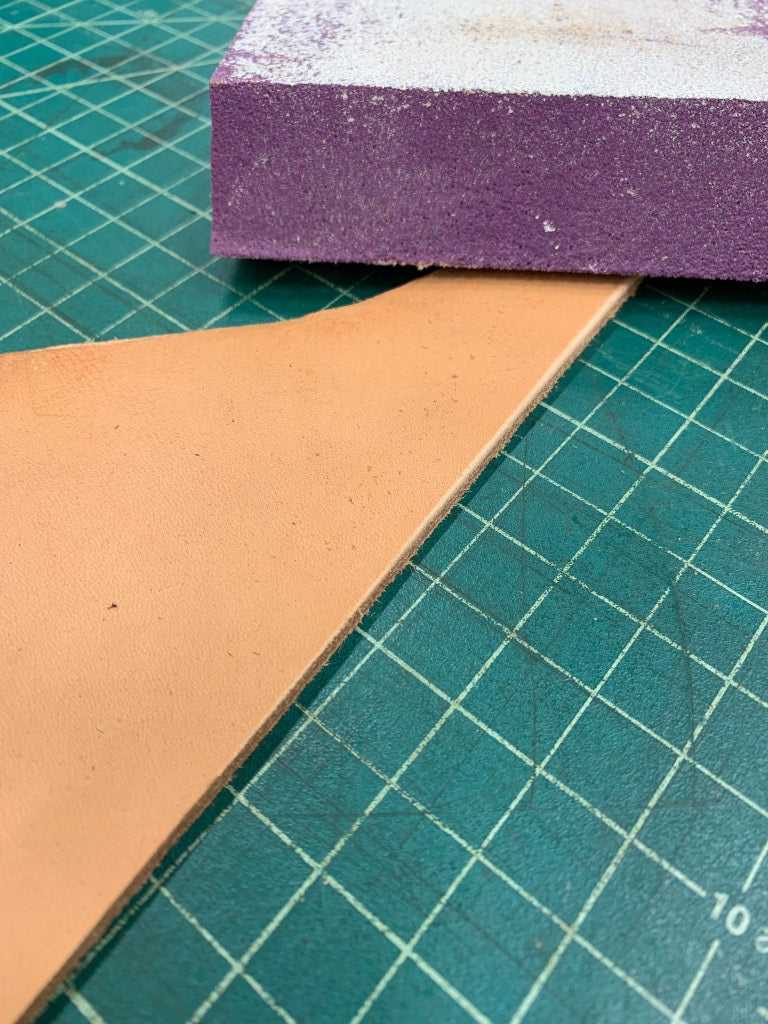
DIY Leather Edge Beveling
Sometimes called "edging," beveling is rounding the edges off a sharp, straight cut, just like they do with kitchen countertops.
In the workshop, we use an edging tool to scrape off the edge (a tool Geoff nicknamed "the shark bite" for its tendency to gouge fingers!), and a quick sand with a fine sander to take off the fuzz.


To DIY beveling leather edges at home, a simple strip of rough sandpaper with a little extra elbow grease works just fine (no shark bites necessary!)
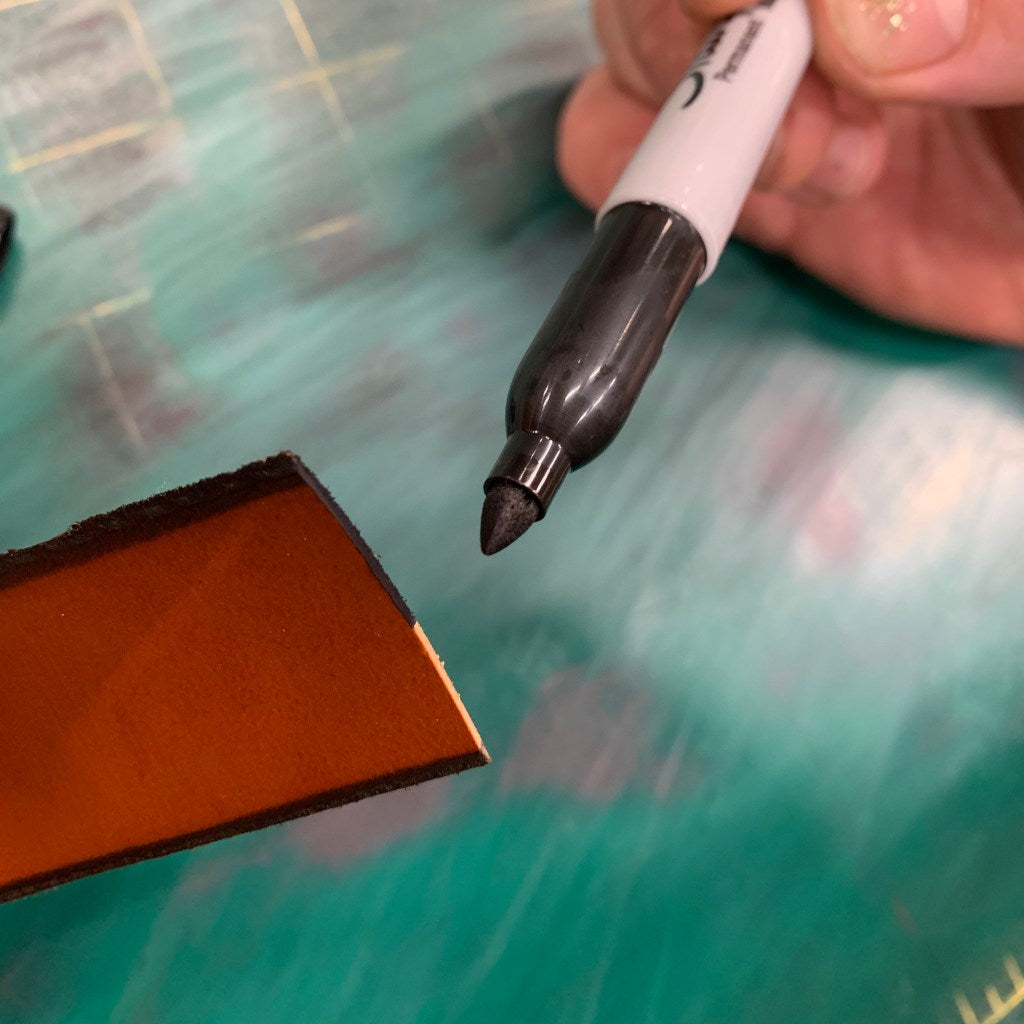
DIY Leather Edge Dye
For surface-dyed leather, the cut edge can reveal the natural leather color sandwiched inside. Finished edges are dyed to match or complement the surface color.
In the workshop, we use a special, old-fashioned leather oil dye to make the edge color blend in with the surface.
To color the edge at home, an easy DIY substitute is a fine-tip or larger "Sharpie" or permanent marker in either "dark brown" or black.
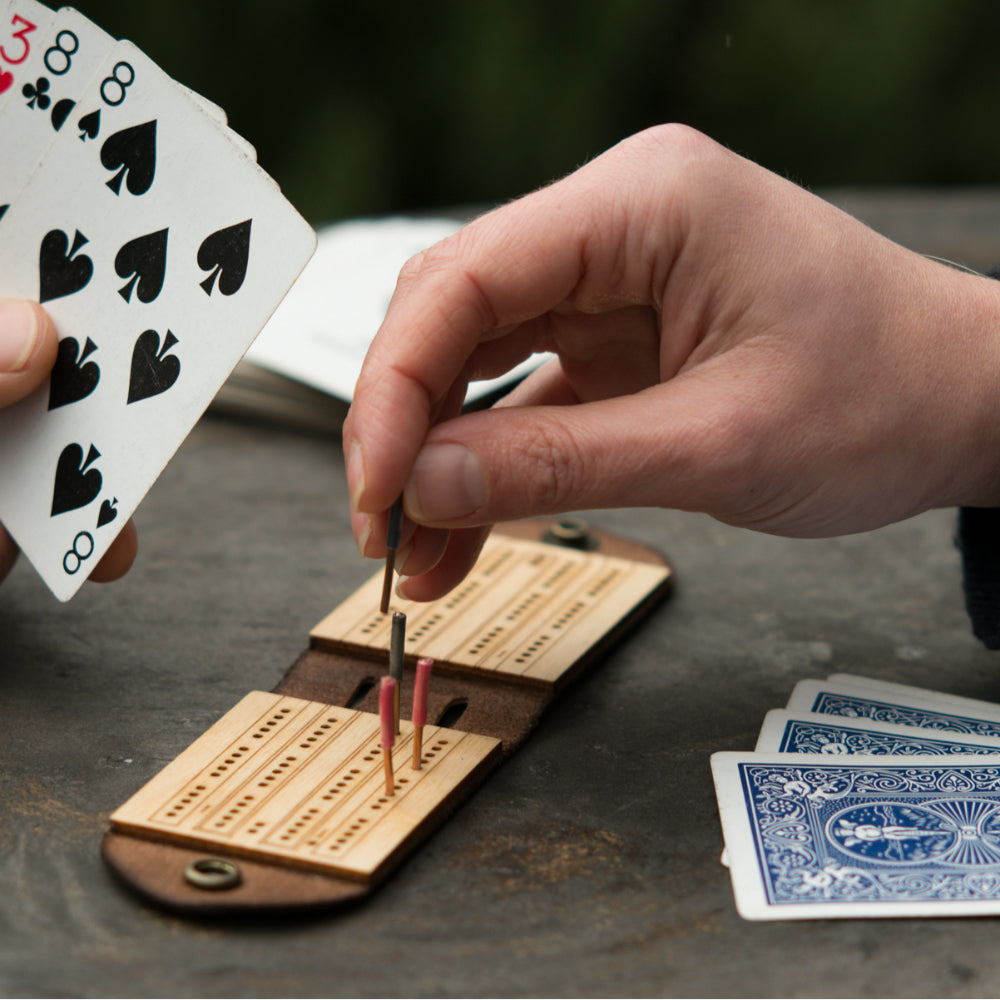
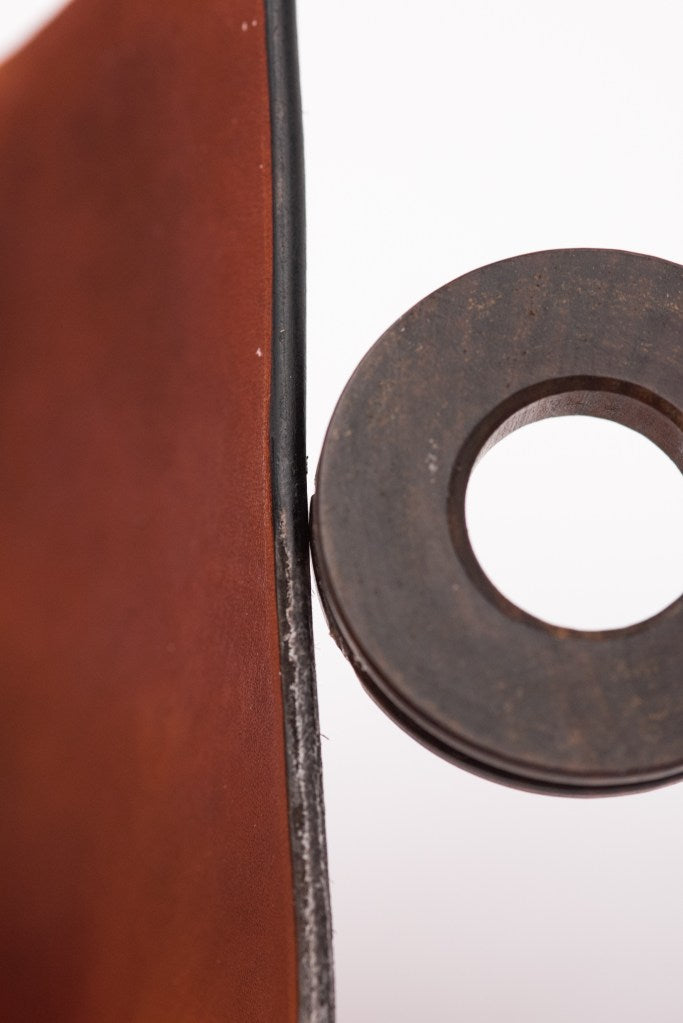
DIY Leather Burnishing
Burnishing is the process of melting wax onto leather for smooth, glossy, and sealed edges. It's an extra step not commonly taken with leather goods today.
To DIY burnish, all you need is a little bit of wax and a piece of rough cloth like canvas.
Lightly drag the wax along the leather edge, which leaves little small chunks of wax. Beeswax is traditional but paraffin or a natural, undyed wax candle is easier to find.

Then use friction to melt the wax into the edge with the cloth.
In this photo, we're using a hardwood circle that is a burnishing tool called an "edge slicker." It does the same job that a piece of canvas or denim will do.
Have you tried these tips? Let us know how it turned out in the comments below.


Leigh
April 19, 2025
Thank you for sharing. Appreciate the information.